Other portable audio devices. Whether rain, splashes, or accidently submerging your microphone water eject, water gets trapped inside, which can have a disastrous effect on your sound, namely muffling it and distorting it.
The good news is, there are a few effective strategies for getting microphone water eject out of your microphone whether you it be with sound–based water ejecting techniques or manual drying methods. This article will guide you through the best methods to eject any water from your microphone and prevent future water damage.
Why Does Microphone Water Eject?
How Does a microphone water eject works by working on sound vibration and converting them into electrical signals. This process gets interrupted once water reaches the microphone by:
Covering the microphone’s diaphragm, limiting its sound-capture ability.
Advanced microphones have technology that creates short-circuiting electrical components.
Leading to corrosion, which can result in lasting damage.
Which is why it’s important to pull water out as quickly as possible.
Common Signs That Your microphone water eject Is Clogged With Water
Just make sure that the cause of your microphone issues is indeed water before trying any of the water-ejection methods. Here are some common signs:
Muffled or unclear audio – You sound weak or distorted in the recording.
Low volume pickup – The microphone fails to pick up sound clearly.
Crackling or static noise — Audio playback produces sounds like crackles or static.
Son never available — The mic just bloody stops working.
If you experience these symptoms after being in the water, it’s time to take action.
How to Get Microphone Water Eject
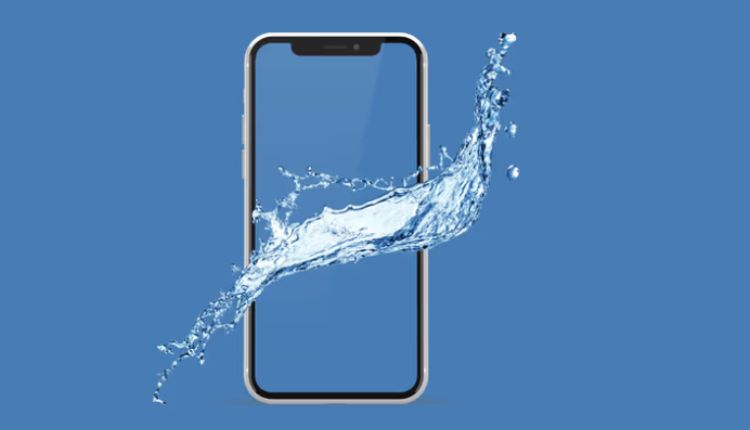
Speaker Test: Use a microphone water eject (Frequency-Based Method)
The best way of getting water out of your microphone is forcing it out using sound much like the high pitch it makes. This method is common in phones and smartwatches that can resist water, such as the Apple Watch.
How to Do It:
Play a sound frequency (165Hz – 200Hz) that causes vibrations, so it pushes out water from the microphone.
You can find those sounds on YouTube using the query words “water eject sound”, or you can use applications which are built for that goal such as Sonic (iOS) or Speaker Cleaner (Android).
After that, increase the volume lightly and play for 1-2 minute.
Use a microfiber cloth to remove any expelled water.
This technique works because specific low microphone water eject frequencies trigger water droplets to vibrate and shake out of the small microphone openings.
Shake and Hit Gently on the Side of the Device
If the microphone port is compromised, physically freeing it may help.
Steps:
Ensure that the microphone’s direction is downward when holding the device.
Give it a little shake to let water drip out.
Gently tap the area surrounding the microphone to dislodge any droplets caught there.
Just don’t shake too hard, especially if you use sensitive devices such as smartphones, wireless microphones or cameras.
Use Compressed Air (Carefully)
A gentle shot of compressed-air should blow the water out of the microphone water eject. But so much force can drive water deeper in, or break brittle elements.
How to Do It Safely:
I recommend using a can of compressed air with a nozzle.
Use the spray in short bursts and keep the can upright.
Do not bring the nozzle closer than 6″ from the microphone port.
Do not blow air directly into the microphone with your mouth, the moisture from your breath can aggravate the situation.
Use Silica Gel or Rice to Microphone Water Eject
Microphone water eject that are totally submerged, use silica gel or uncooked rice to dry it.
Steps:
Shut your device down right now.
Put it in a sealed bag or container with silica gel packets (best) or uncooked rice (second best).
It should rest at least 24 to 48 hours so that it can better absorb moisture.
Finally, let it dry and then test the microphone by recording.
Silica gel lowers microphone water eject moisture levels faster than rice as it reduces the amount of dust particles.
DO NOT: Use a Hairdryer or Fan (Only at Low Heat)
Blasting warm air in may also hasten drying, but extreme temperatures can harm your microphone.
Safe Drying Method:
Hairdryer on low heat setting or fan.
Keep it at least a foot away from the microphone.
Blow slow air for 5-10 minutes checking repeatedly if it got better.
Don’t expose it to excessive heat, as it may melt glue or damage the internal components.
Let It Air Dry Naturally
If you have time, microphone water eject allowing your items to air dry is a safe, effective way to dry them.
Put your device in a dry place with good ventilation.
Let it sit for a few hours, or overnight.
Do not use the device while it is drying.
This method works well for mild cases of moisture exposure.”
How to Protect Against Future Microphone Water Eject
Here are some preventive microphone water eject measures you can take to protect your microphone from water damage:
Use a waterproof case or cover
If you are regularly operating your device around water, buy a waterproof case or an external microphone cover. This is crucial for vloggers, podcasters and field recorders alike.
Do not use your device in wet environments
Avoid exposure to rain, splashes and high-humidity environments. When not using it, if necessary, keep in an airtight bag.
Keep an Eye Out for Microphone Water Eject
Even in humid climates, there is humidity condensation that can cause issues without direct exposure to water. Regularly wipe your device with a dry microfiber cloth.
Turn On Smart Devices’ microphone water eject
Certain smartphones and smartwatches even have inbuilt water ejection modes. For example:
iOS Shortcuts for iPhones have a “Water Eject” command.
Apple Watches have a feature that automatically ejects water from the speaker when you rotate its Digital Crown.
Use these functions to keep your microphone moisture-free.
The Bottom Lines
Water getting stuck in your microphone can cause muffled audio, static sound, or even permanent damage. According to frequency-sound microphone water eject, shaking, drying or silica gel absorption, you can let the water out and the audio quality recovered.
Protect your devices with protective accessories and avoid any damp areas that could cause water retention and lead to corrosion. However, by following these steps you can make sure your microphone stays in top condition and provides you with the clearest sound possible.